EC2 stands for Elastic computing cloud and it’s virtual server in Amazon web service’s terminology. It comes with own computing power.
EC2 has pay as you use model unlike other virtual server providers.
The instance will be charged per hour with different rates based on the type of the instance chosen. AWS provides multiple instance types for the respective business needs of the user.
Go to your AWS management console. Login using your credential.
I am assuming that you have already created AWS account.
Go under the services and Search for EC2 under AWS services

[Tell about free tier access and provide Link]
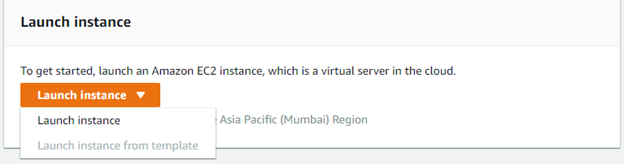
Go under Launch Instance > Click on Launch Instance.
Now you need to select the AMI (Amazon Machine Instance)
Step 1: Choose an Amazon Machine Image (AMI)
Click on the Free Tier Only tick box
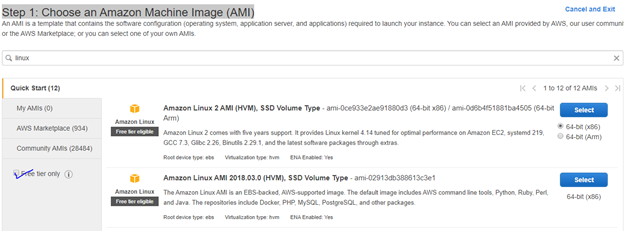
Select 2nd one
Step 2: Choose an Instance Type
Select t2.micro (Free Tier Eligible)
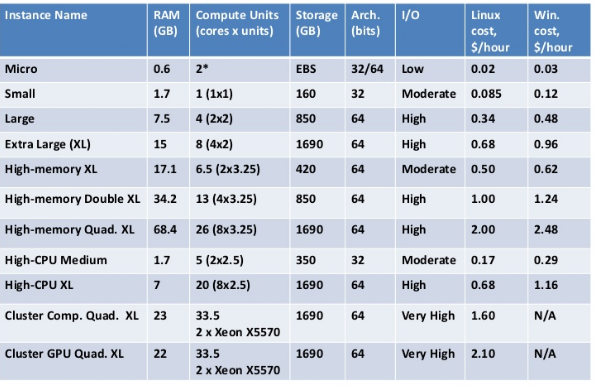
Here are some EC2 instance types for your info.
Click On Review On Launch.
Review the Changes and click on launch.
Before Creating instance it will check for your key pairs, If you haven’t created the key pair yet, then follow the procedure and create the key pair.
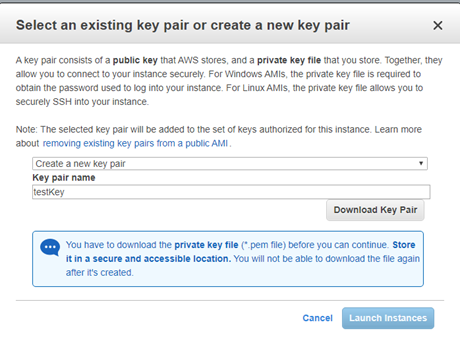
It will be needed to login using SSH and SFTP.
Insert the key pair name and click on download key pair.
It will download the .pem file
Click on Launch Button
Kudos !
You have successfully launched your First EC2 instance.
Now You can click on View Instance. view the instance details like public ip etc.
Wait a minute !
You must be thinking, What should a do with that .pem file ?
Answer is with that file we will be able to login into the EC2 instance using SSH and SFTP.
Here is a guide how to do it step by step.

Useful content. Looking fwd to more materials like this. Thanks
LikeLiked by 1 person